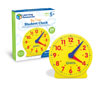
Big Time 24-Hour Geared Student Clockby Learning Resources
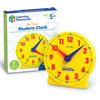 |
12hr Student Clock | PR8042 | £5.91 | |
| 24hr Student Clock | PR8450 | £7.99 |
Product Information
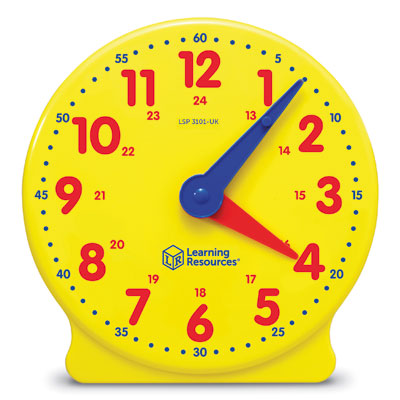
Hidden gears maintain correct hour and minute relationships as you demonstrate time-telling concepts.
This clock is ideal for students to develop time-telling concepts.
- Approximately 13cm high.
- Clear hours and minutes markings are easy to read.
- Coloured markings ensure that hours (red) can be easily distinguished from minutes (blue).
- Clock features removable stand on reverse side.
- Includes Teaching Guide.
Hand Movement
The Big Time Learning Clock is designed to make learning to tell time easier through hands-on activities. The clock’s geared hour hand moves in relation to its second hand, closely replicating a real clock’s inner workings. Its easy-to-read face and geared assembly allow children to watch both hands moving at the same time.
Note: Move only the minute hand; the hour hand cannot be moved independently.
Getting Started
Explore the Big Time Learning Clock with children. Ask them the following questions:
- What is different about the two hands on the clock? (Line them up to compare their lengths.)
- Which hand is called the minute hand, and which is called the hour hand?
- What do they think the numbers mean around the clock’s face?
- How is the clock like the clock in the classroom?
- How is it different?
- Have they seen other types of clocks? What do they look like?
Suggested Activities
- 1. Exact Hours. Count around the clock face, pointing to each number. Give students a specific time, exact hours only, and as them to indicate the same time on their clocks. Demonstrate that the minute hand must point straight up (to the 12/24) for it to be an exact hour.
- 2. Half- and Quarter-Hours. Show how the clock can be divided into four equal pieces. Introduce the terms “half past,” “quarter past,” and “quarter to” using the demonstration clock. Turn the minute hand to the 3, 6, or 9 on the clock, or to the 12 for an exact hour, and ask students to tell what time the clock is showing in each example.
- 3. Five-Minute Increments. Count around the clock by fives, moving the minute hand around the printed numbers as you do. Help students understand that there are 60 minutes in one hour. Give students a time ending in a 5 or a 0 (10:20, 3:35, etc.), and ask them to show the time on their clock.
- 4. One-Minute Increments. Count around the clock by ones, moving the minute hand around the clock as you do. Reinforce that there are 60 minutes in one hour. Give students a specific time with exact minutes and ask them to show the time on their clock.
- 5. Working Backwards. Once children have mastered the minute hand moving clockwise, work “backward” from exact hours. What does “10 minutes to 5” look like? Count backward around the clock by fives, moving the minute hand as you do. Continue with other examples until you get to the 30-minute mark. (Generally, no more than 30 minutes are used to indicate the amount of time until the next hour.)
- 6. Elapsed Time. To help children gain a sense of elapsed time, try some elapsed time hands-on activities. For example, How long is a minute? Have students stand by their chairs facing away from a clock, so they can not see it. Have the students sit down when they think a minute has passed.
- 7. Setting a Timetable. Have students replicate the daily class schedule on paper, then follow along with the clock. How long does each subject last? How long is the school day? Ask students to write out a typical schedule for their entire day. For each activity, have them calculate the elapsed time using starting and ending clock times. Have students compare the times spent on shared activities.
Recommended for Ages: 5 - 9 years

